|
So you’ve identified your unfinished attic space as a prime target for new living space in your home. Maybe you have a growing family and need an extra bedroom? Maybe you’d like to turn that attic space into something really impressive like a reading nook, kids play room, or a walk-in closet. The hunt for more square footage never stops! Whatever you have in mind - whether it’s to stay in the home long term - or you’re dropping some cash for renovation for resale, there are endless possibilities for how to finish your attic space. Converting An Attic to Living Space Legal Considerations Before You Begin You’ll need to understand local building codes before you begin this project to better advise your contractor to your needs. Contractors will, surely, be up to date on all these rules and regulations - but it’s helpful if you can speak the language too. Simply put, your attic needs to “qualify” for conversion based on local ordinances. Make sure the space meets local building codes. The room will need 7 feet of vertical clearance, and 70 square feet available among other rules like a safe way of egress. Find out who will get the permit. Reach out to your local permitting office to find out if you need a permit for your attic conversion. A permit is usually only needed if you are adding electrical wiring or ventilation, or if you plan to change the structure of your home in the process, such as knocking down an existing wall or adding a dormer. Consider heating and ventilation needs. It will be an extra cost for duct work if your heating system doesn’t incorporate the attic space. HVAC pros can help figure out this issue. There are higher and lower cost options for this. Building code requires that your attic can maintain a temperature of 68°F. This is normally not a problem between your current heating and cooling system and attic insulation. Understand fire codes. Fire prevention, and a way of egress for anyone inside the room, are both critical to receiving a permit to build. New staircase. For those turning the attic into a bedroom, a staircase will need to be added as a way of entry. No drop ladder or otherwise unsafe entry will be permitted. A popular option is a wood or steel spiral staircase which is much more flexible than a traditional staircase and takes up less space in your home. How much does it cost to convert an attic? The average cost of an attic conversion is $49,438, according to HomeAdvisor. The cost of the project will depend on the elements your project includes. For guidelines on spend limit, Porch.com also suggests investing a proportionate amount to your home’s current value, saying it should be no more than 15%. For instance, if your home is valued at $150,000, you won't want to spend above 15% of that or $22,500. These figures are all assuming that you won’t have extra work needed to bring the room up to code in order to start the project. Plus, don’t forget there should be a bit of furnishing costs built in for furniture and decor! Most homeowners who undertook an attic conversion have no regrets -- the project gets a Joy Score of 9.5, a rating based on those who said they were happy or satisfied with their remodeling, with 10 being the highest rating and 1 the lowest. More Attic Conversion Costs By Projects
Attic Conversion ROI After the conversion, you’ll have a wonderful new living space in your home. But what about at resale? The 2019 national average for the return on investment of an attic conversion was 56% according to Remodeling.com. If you spent $40,000 on your renovation, you can expect $22,400 to be added to your home's resale value. It's a great way to add to the home’s living space without the complexity that comes with an addition. Other figures are similar to the ones provided by Remodeling.com According to "Remodeling Impact Report" from the National Association of REALTORS®, an attic bedroom conversion that includes a small bath has a national median cost of $75,000 and retains 53% of its value if you should decide to sell your house. Adding extra living space is key for homeowners who want to improve interior appeal, but don’t have the go-ahead from the city for exterior expansion. Lastly, if the attic is converted into a bedroom, you now have the option of renting out the room on a long-term basis, or on a short-term basis through websites like Airbnb. Further Project Considerations So your attic is up to code and you’ve hired a contractor and secured a permit. Depending on what time of room you’re converting the attic into, here are some things to consider and discuss with your contractor: Wiring the attic. Hire a licensed electrician to wire the room to spec (there should be one outlet every 12 feet on average.) Cleaning the attic. Obviously before a contractor begins the attic conversion you’ll need to clean out any storage currently taking up space. If there’s currently insulation in your attic, you’ll need to vacuum it up or replace it. Building a subfloor. If joists are visible on the floor of your attic, you will need to build a subfloor. To reduce sound traveling from your finished attic through the floor to the rest of the house, you can add insulation under the subfloor paneling or choose a thicker subfloor panel. Insulating the attic. Determine what type of insulation is needed for the project. You’ll want to prevent heat loss so the room is comfortable. Install drywall & ceiling. Once the drywall goes up, you’ll feel like the project is almost complete. Decide what color you want to paint the drywall (typically white or another light color) and if you have space for a drop ceiling, or if the drywall will meet at a peak. Will you be using beadboard or drop ceiling? How about wood paneling to give a rusic charm? Finish with flooring or carpet. Many homeowners choose carpet for an attic space as it adds insulation, comfort, and noise reduction. Though hardwood is a nice second choice. Storage and seating. With shorter walls typically accompanying an attic conversion, speak to your contractor about built-ins for storage (like toys or clothing), as well as possible bench areas for more comfortable spacing. Windows & lighting. When renovating your attic, windows and natural light are a huge consideration. By allowing a lot of natural light into the room, it not only looks bigger, but it’s also a more enjoyable space. There are two windows that are most common in attics: dormer windows and skylights. Types of Attic Conversions Attic to bedroom conversion. This is a classic attic conversion for a growing family. Attic bedrooms are great for little kids since the ceiling heights tend to be lower. Also a nice upgrade for a teen who wants more privacy and space than being crammed in with younger siblings. Attic to playroom conversion. Buy brightly colored decor and make the attic into a playroom for kids with a soft carpet and plenty of natural light. Slanted ceilings can help inspire you to draw, play and paint (you can even try chalkboard walls.) Attic to office conversion. In 2020, more businesses are embracing the value of at-home work, rather than long commutes and disgruntled employees. With that said, employees need a quiet, comfortable place to work at home. Consider converting your attic space into a home office with a desk, monitors and more. Attic to closet conversion. Finally, that walk-in closet you always dreamed of! Enjoy unparalleled luxury with a walk-in closet with shelves for all your shoes, scarves, socks, and everything in between. Fashion lovers rejoice! Ready to convert your attic to a living space? Contact Boston Renovation’s experts today at 978.697.4625 or start here by giving us your project details. A kitchen remodel is a massive undertaking. Not only the obviously large decisions (like, “Can we fit an island in here?”) as well as the smaller details (“What type of cabinet pulls will look best?) One of the major decisions to make is choosing a kitchen backsplash. It’s the focal point of the kitchen’s design and a wonderful chance to show off your creative side. It may seem like a simple task, but choosing tile for your backsplash can be complicated, there are a variety of things to consider that will affect your overall kitchen design. So, do you take a risk with color? Play it safe with white subway tile? Whatever you choose, follow our guide on how to choose a kitchen backsplash. Reminder: Always speak with your designer or contractor about your preferences before a project begins! If you need help finding a kitchen contractor in your area, talk to one of Boston Renovation’s experts today! Top tips for choosing a kitchen backsplash
Start with the proper budget According to HomeAdvisor.com, installing a backsplash in your kitchen costs an average of $1,000. You could pay as little as $600 or as much as $3,000 depending on kitchen size. Price factors include finish types, amount of tile needed, pattern complexity, and the level of difficulty. This could depend on whether the area has an electrical socket, door, or window. If your budget is tight, you'll want to lean toward standard sizes. However you can still add fun details. Bordering a few Handpainted pieces with classic white field tile is a great budget friendly way to add handmade, artistic appeal to your kitchen without breaking the bank. Keep in mind that specialty shapes and more intricate glazes do cost a bit more. The manufacturing process is more detailed, and we make everything by hand. Custom colors will also drive up your price. When on a budget, avoid trendy tile and revisit classic white ceramic that can cost less than $1 per square foot. If you need to cover lots of area, like an entire wall, you can add interest without emptying your bank account by opting for practical metal panels. Size the backsplash properly OK, so now that you’ve got your budget sorted out, think about how much tile you’ll actually need to get this done. Multiply the width by the height of the wall to determine the square footage, which will tell you how much material you'll need. Account for an extra 10 percent of tile just to be safe. If you just want a hint of tile, only bring your backsplash up to the bottom of your cabinet or first shelf in an open shelving design. If you want more tile, you can often extend your backsplash to the ceiling in areas where there are no cabinets. Know how to draw the eye to high impact areas Most visitors to your kitchen will naturally look towards two areas - the space above the range and above the sink. There is more square footage of wall space above the range and sink, so you can play with tile design. Consider a neutral field tile for the rest of the kitchen, then bring in a funky glass tile to create a showy centerpiece above the stove. Work in strong patterns here, if you’d like. Some options include installing tile on the diagonal, or applying a staggering brick pattern with slim subway tiles (now they come in sizes like 1-by-2 inches or elongated 4-by-12 inches). Choose the right material for you Tile is, and always has been, the most popular choice for kitchen backsplashes. But recently other options have presented themselves. Glass is beautiful, but not budget-friendly. Natural stone is visually striking, but requires an updated sealing once a year. Ceramic is durable, easy to clean and low cost. Ceramic’s cousin, porcelain, is actually denser and therefore more durable and resistant to moisture. Cork mosaic tiles are appropriate for walls or floors, and tiles made of 100-percent bamboo are sealed to create a backsplash that's warm yet contemporary. Recycled glass tile is durable, stain resistant and comes in a range of unique colors that result from melting and repurposing recycled glass. Lastly, if your kitchen is rustic or industrial, brick might work best. Pick colors to stand out or to fit in As with the material choice, choosing a color for your kitchen backsplash is key to the entire renovation process. Before you make any material or color choice, live with the samples for awhile. Tape color and tile samples to the walls to see what they look like throughout the day as natural light changes. Choose one main color and a couple of accent colors to use throughout the kitchen, including the backsplash. If you choose a colorful countertop material you'll want to choose a neutral tile color (but you can still go wild with pattern). If your countertops are neutral, choose tile that complements the texture and tone of the countertop material. Contrast your design with your countertops Being too coordinated between backsplash and countertops leads to a boring look. Play with colors and shapes (as well as horizontal vs. vertical alignment) when designing your backsplash and countertops. Your tile backsplash is always going to be right up against your countertops, so it is important to make sure the two materials and colors work well together. Try mixing metallic tiles in different shades with various finishes, such as brushed stainless steel, oil-rubbed bronze or even an antique brass. By including small tiles of marble or granite, you can pull in the countertop color without being boring with a panel of granite that extends up from the countertop. You’ll also want to consider how your lighting fixtures and other hardware either match or clash with the backsplash choice. Make smart shape and pattern choices
Show your originality but choosing a tile shape that suits your tastes. If you want a timeless design, choose a classic size such as 3x6 subway tile layout or 4x4 squares. This will never go out of style. If you want to get a little more funky, specialty shapes can be fun, too. If your kitchen is otherwise rather bland, a backsplash tile shape that draws the eye will be a show-stopper. Think triangles, circles, or even a custom shape. Don’t forget that seal and grout are key Different tile materials have different sealing needs. Natural tile like granite, marble, and slate needs to be resealed once a year, while travertine needs resealing every two years. As a homeowner shopping for replacement windows, you might find yourself overwhelmed by a flood of customization choices. From style, to frame color, to grids, it can be challenging to figure out which decisions are the most critical. For most homeowners, the most important decision is that of glass type. This is especially true if you’re concerned about energy efficiency (and who isn’t?), as 70% of energy loss in the home is due to windows and doors. Low-E is an innovative solution that improves energy efficiency in the home.
To understand the benefits of Low-E glass windows and what makes them energy efficient, we’ll cover:
What are Low-E glass windows & what makes them energy efficient? Put simply, Low-E glass keeps unwanted light rays from entering the home, while preventing interior heat and air conditioning from exiting. It does all of this without blocking natural light from passing through. To really understand how this energy efficient window coating works, we need to first explore the solar energy spectrum and the types of light involved. The three important light rays we’ll discuss are ultraviolet (UV) light, visible light, and infrared light. These light rays all occupy different parts of the solar energy spectrum, and are differentiated by their respective wavelengths.
While this may seem like an unasked for science lesson, the knowledge of these three light types is critical to understanding the benefits of Low-E windows. Another key concept is emissivity, which is how well a material radiates energy. When it comes to windows, the lower the emissivity, the higher the energy efficiency. That’s where low emissivity (or Low-E) coating factors in. This coating, which is thinner than a strand of hair, limits the emissivity of the glass. Low-E glass prevents ultraviolet and infrared light from passing through the glass, into the home. At the same time, it maintains a stable temperature in your home by reflecting interior heat energy (whether it’s cool or warm), back inside. All of these factors make these windows extremely energy efficient. For one, they prevent solar heat from entering the home, which means less of a need for air conditioning in the warmer months. Additionally, the reflective insulation properties cause them to radiate interior temperatures, whether cool or hot, back into the home. This means your house stays cool in the summer, and there is no need to blast your heater in the winter months. In summary, the benefits of Low-E glass windows are:
Low-E Coating Performance Indicators There are four different measures that indicate the effectiveness of Low-E glass, according to Vitro Architectural Glass:
Types of Low-E Glass Coating There are two variations of Low-E glass coating, known as passive Low-E and solar control Low-E:
Which Low-E glass coating type is best for my climate? After covering the two types of Low-E coating, you’re likely wondering which is the right choice for your home. The most influential factor in making this decision is your local climate. Let’s explore which coating is best for each climate:
Do my windows have Low-E glass coating? It’s been over 35 years since this coating revolutionized the window industry, so there’s a chance that your home already has Low-E windows. To determine if this is the case, you can do the following:
If you’re starting to explore a window replacement, and the many options available to you, it’s important to recognize the important of the glass type you choose. Window class has a major impact on the energy efficiency on your entire home. While Low-E coated windows are often slightly more expensive, the potential energy savings that accompany them make the investment worthwhile. As winter approaches you’re probably noticing more of a draft coming from your old windows. If they haven’t been replaced in many years, chances are you’re using only single or double pane windows.
So what’s the deal with triple pane windows? These are the most advanced windows on the market with three panes of glass, instead of two or just one. Each of the panes has a spacer included to keep the distance between each pane uniform. The windows are also sealed airtight with pockets of gas filling the space for insulation. As technology in replacement windows advances, triple pane has become more of the norm than a luxury product. Triple Pane Window Costs Triple pane windows are priced a little higher, but well worth the expense. How much do triple pane windows cost? The average cost for a replacement triple pane window installation is $700 per triple paned window, depending on other factors like size, material, and style. Because of the additional pane of glass and more complex construction and installation, you can expect to pay at least 10 to 15% more for triple pane vs double pane windows. The windows pay for themselves over lifespan through energy cost savings (more on this below.) Triple Pane Window Costs By Brand Here's a look at triple pane window costs from popular brands for a standard vinyl double hung window: Marvin: Triple pane windows from Marvin cost an average of $800 including installation. Harvey: Triple pane windows from Harvey cost an average of $600 including installation. Simonton: Triple pane windows from Simonton cost an average of $500 including installation. Pella: Triple pane windows from Pella cost an average of $650 including installation. Andersen: Triple pane windows from Andersen an average of $700 including installation. Benefits of triple glazing There are a few core benefits of triple pane windows. Greater noise reduction. Triple pane windows are the best on the market and decreasing outside street noise from humans, traffic, nature, and more. If you live in a city, this could be a major lifestyle boost. Better insulation. Triple pane windows may pay for themselves in the end thanks to advanced insulting properties. Your energy system will need to work less to keep the inside temperature regulated. No more drafts, and no more high energy bills. Sounds good to us! Cost savings. In cold regions, such as New England, triple pane windows can save 2 to 3 percent of your heating bill, compared with double-glazed windows. That will add up to cover the extra cost for the windows in about 20 years. Reduce condensation. Triple glazing will reduce condensation, which will allow you to maintain a higher indoor relative humidity in cold weather. If you don’t want to pay for triple pane windows throughout the house, get them for the north- and east-facing rooms, where you’ll get the biggest payoff. Added value. Triple glazed windows add value to your home and you can recoup some of the cost when selling your home. Double pane vs. Triple pane windows OK, so now you know that triple pane windows are a bit more expensive than the other options available, especially the common double pane windows. So what’s the difference and how do you decide? First, how long will you be in your home? It’s important to consider the cost outlay now vs. the savings over time. Staying for 20 plus years? Triple pane. Moving out soon? Double pane. There are many falsehoods you’ll hear about triple pane, too. For instance they aren’t too heavy to fit in a traditional window frame. No worries there. Triple pane windows will operate with the same ease as double pane windows. They also will not have seal failure more often than double pane. All new windows will come with a warranty that will cover you in the event of any type of failure. In fact, triple pane windows have a better U-factor than double pane and 20-30% better on energy efficiency — that’s a substantial margin. Triple pane will also have better visible transmission figures. While these statistics will vary according to where you live and the exact windows your home has, you can find out more about your windows’ energy efficient performance by checking out their Energy Star rating. They will also have better SHGC ratings as they tend to have two surfaces coated with a low-e coating. These coatings will leave you with a lower visible transmission rating meaning it will typically be darker in a home with triple pane windows. Are these increases in efficiency worth the trade off of increased cost and decreased light? Only you can decide that, but with the cost difference likely being lower than you might expect more folks are picking triple pane options. Lastly, the cost difference between double pane and triple pane windows is not too bad. Triple pane windows cost an average of $100 more per window than double pane. Interested in learning more about triple pane windows? Talk with a Boston Renovation expert today by entering your project details or picking up the phone and calling us at 978.697.4625. How Boston Renovation's Process Works 1: We visit your home. After answering a few questions online, our licensed expert will complete a detailed project report in-person. 2: We get you 3 bids in 3 days. Vetted local window contractors submit bids based on your report. Our expert helps you translate and compare them. 3: Meet your top contractor. Choose the best window installer and meet them before committing. We stay in touch to ensure the project goes smoothly. A home improvement project is a big deal for any homeowner. Once you saved up the proper budget and done your preliminary research on materials, colors, and timelines — the time has come to find a reliable contractor. Most importantly, you want a contractor who is licensed and insured in your state for the job requirements. So how do you check a contractor’s license?
Here are 6 different ways to check a contractor’s license in your state:
Use your state’s online directory Your state or contractor governing body should offer an online database where licensure can be searched via name, business, or other means. For example, in Massachusetts (where Boston Renovation is based) a contractor’s license can be searched on Mass.gov. You may also be able to view things such as how long the contractor has been licensed in the state, whether they have any complaints filed against them, or whether they have a bond and insurance. If your state does not have a website with this information, look up the number for the department on your state’s website and call the office. The information is always free and open to the public and you can typically get an answer that same day. Another state leading in contractor/homeowner relations is California, where a California contractor’s license can be searched on CA Contractors State License Board. Find the licensing agency in your state through the the National Association of State Contractors Licensing Agencies. Review their Better Business Bureau page Better Business Bureau is an impartial website where consumers can leave complaints or praise for many services businesses, with most contractors having a page there. As part of the contractor’s “Profile” there are areas where license #s can be entered in. Does the contractor have a license number on hand with BBB? Verify before moving forward. Ask the contractor for proof If you got it, flaunt it. Ask the contractor to give you his license number for verification, or send you an image of the paperwork. If the contractor is being cagey or pushes back on your request, you should consider that a red flag. Work with an industry expert Contacting a team like Boston Renovation can help take the guesswork out of finding a licensed contractor. We fully vet all of the contractors we would suggest to you, and help you get 3+ competitive quotes in 3 days. There’s a lot to be wary of in the home improvement space, and we’re here to make you feel at ease. Read online reviews For further investigation into the aptitude of the contractor, read what others are saying on Google, Yelp, Facebook, BBB (see above) and other vertical sites. Are reviews mostly positive or mostly negative? Are there any reviews at all? The absence of reviews can be a troubling sign as much as pervasive negative reviews. Some popular websites to check reviews and verify profile information:
Check the contractor’s website Lastly, a contractor should have this type of information somewhere on their website. Those who understand the marketplace will have the license numbers front and center (most likely in the footer of the website). Before signing any contract, check with your local contractor licensing board. It should tell you whether the contractor’s license is valid, whether a bond is in place, and whether there have been any claims filed against the contractor that you should know about. Frequently Asked Questions: What Is a Contractor License Board? The contractor licensing board is a state-run organization that approves and tracks contractors, builders, and sub-contractors. It also issues licenses to contractors in the area, typically upon passing certain state requirements. This board also has the ability to revoke licenses. What Does It Mean That a Contractor Is Bonded? Most states require that contractors secure a bond in their name in order to obtain a license. A bond is a large sum of money, held in a non-interest bearing account in case the contractor should make a mistake that warrants a large amount of liability. Most bonds are obtained through insurance companies and the contractor makes a regular payment to maintain their bond. Know the common industry terms Licensed: Contractors have been granted a trade license as mandated by state and local laws. It generally requires passing competency tests about business practices and trade skills, paying a fee and proving insurance and/or bonding. Registered: Typically less stringent than licensing, it often requires contractors to prove insurance and pay a fee. Sometimes it requires bonding, but rarely tests competency. A few places use licensing and registration interchangeably. Bonded: Contractors have an arrangement with a third party (a private bond issuer or a recovery fund held by the licensing municipality). Homeowners may petition for reimbursement through that third party if contractors harm them financially because of shoddy work or failure to pay subcontractors as promised. Insured: All contractors you hire should be insured. Ask to see a Certificate of Insurance, then call to verify the policy is current and carries enough coverage for your project. No one likes to be pressured to do anything they don’t feel comfortable with.
Being pressured to purchase something is among the worst forms of pressure. When salespeople make you feel like you need to buy something immediately, or else it will run out, or the price will go up - it’s wrong. We’re normal people, so we don’t like high-pressure sales. At all. Every member of our team has experienced high-pressure sales at some point. At a retail store, a car dealership, or on a renovation consult - high-pressure sales tactics don’t make anyone more inclined to buy. High-pressure sales is the norm in the renovation industry, and honestly, it’s a ridiculous and outdated way to get things done. For most renovation consults, contractors will come to your home and not leave until they have a signed contract. The tactics they take to get your signature are almost barbaric. Some may refuse to even leave your house if you don’t want to work with them. Think about that for a second. They. Won’t. Leave. How is this still a thing?!?! It absolutely sucks to be pressured into purchasing something - especially a renovation project. Here, you won’t be pressured. You have all the control. You create your project from the comfort of your own home (or office, or car, or wherever you are online), and are never pressured into a consult or installation. You have all the power, and that’s the way it should be. Ready to get started? Call a Boston Renovation Project Consultant at 888-392-4236. If you can identify with one or more of the valuable reasons listed on this list, then it’s probably time for a window replacement. Many homeowners think they need new windows but go back and forth about whether it’s a worthy investment. Reading our top nine reasons to replace windows in your home.
1) Windows have a bigger-than-you-think impact on aesthetics.
Look we get it, it’s not as exciting as getting twin Sub z’s in the kitchen, but the impact windows have on the appearance and style of homes is badly underestimated. Bottom line is, new windows can significantly accentuate or define the character of your home. If you don’t think you’ll notice, ask yourself: how many times a day do you see or use your windows? What about when you’re walking up to your door? See, told you. Many of the homeowner we speak to mention how surprised they are at the impact of their windows on the appearance of rooms in their home. If you have old sills or chipping frames, you should know it doesn't have to be that way. 2) They affect how you enjoy your space Sure, a window’s job may be to let natural light in and keep extreme seasonal temperatures out. You’ll notice a difference from day one in how you experience the space or a room in which you replace your windows, especially if you opt for a window style change. They’ll be totally new (duh!) but they’ll also have the exact appearance that you personally choose. 3) Improved ease of use and safety If you have to “put your hips into it” when closing, opening, or locking your windows, then it's time to move on. It doesn’t have to be that way! Opening and closing your windows should not be a workout. It's not ok - even if your doctor or spouse says you should get more exercise. Speaking of health, old windows may contain lead paint, which is dangerous for children and adults alike. Old sealant or leaking windows can also lead to mold in the home, which is another incredibly dangerous byproduct of old windows. Windows and safety - who knew? 4) Better energy efficiency Being more energy efficient saves you money and reduces the impact you have on the environment. And while every home improvement project may make it seem like "it's all energy efficiency these days”, windows tend not to be the first thing that comes to mind. Many old windows are single pane or have broken seals and there is a tangible difference in energy efficiency by upgrading to new double pane or triple pane windows. That old drafty window in your living room? It gets cold/hot which means you crank up/down your thermostat which means you use more energy which means you consume more fossil fuel. Energy efficient double pane windows reduce energy loss by 30% to 50% over single pane windows. They have low-E coatings and are gas-filled, usually Argon and Krypton which are completely safe and odor less. But what does that even mean? Low-emissivity glass, also known as low-E glass, uses a microscopically thin and virtually invisible metal or metallic oxide layer incorporated in the glazing surface to control heat transfer through insulated windows. 5) They help you be penny wise and pound wise Replacing your windows may be one of the most cost-effective home improvements you can make but not in the way you may assume. Sure, new windows can lessen your monthly utility bills through energy conservation. But don’t believe the hype that your windows will pay for themselves overnight. Anyone telling you that is misleading you. It’s important to have a realistic expectation about the payback period (read: years) and it’s more complicated than you probably realize. Feel free to check out this Energy Star analysis by the EPA if you like math equations (or need a nap!). Fortunately, there are immediate financial incentives to replace your windows that don’t require a years long payback period. Homeowners who install energy efficient windows can take advantage of attractive financing options, tax credits, and rebates. The Department of Energy is a good source for federal rebates and, in Massachusetts, Mass Save helps qualifying homeowners save with 0% financing options on Energy Star certified windows. You can ask us via email or phone for details on how to get started with Mass Save. You can review the EPA’s Energy Star guidelines for tax credits, or check what’s available for rebates and credits from your state. The IRS -- who can forget them? -- also allows tax credits of 10% or up to $200 for qualified Energy Star certified windows, more here. Please consult your accountant or advisor for advice. 6) Boosts resale value Replacing your home’s windows is an underestimated way to improve the potential resale value. According to the National Association of Realtors, window replacement projects can return homeowners more than 78% of the project costs upon resale. A window replacement could go a long way in creating value for you if you're looking to sell now, or even if you’re paying off your mortgage with the hope of an eventual payday years in the future. Bottom line is, if you have a dozen old windows around your otherwise well-manicured house, curb appeal will be dragged down. 7) Lowers maintenance cleaning Admit it - your old windows are a pain to clean or you just don’t even try because it’s a lost cause. Maybe it’s difficult to reach your arm around or you’re precariously leaning outside to wash the exterior. Double hung windows from open and tilt for easy access to both sides of the window for cleaning. You’ll be done and looking through your squeaky clean windows in minutes. 8) Reduces noise Drafty windows can also be loud windows. Maybe from a noisy neighbor? Car or foot traffic? Even street construction or planes overhead can be annoying. And, not to be a grinch, but children playing and dogs barking can stream through your window and disrupt your sleep or your morning coffee. Replacing your windows with dual pane glass windows that are properly sealed and installed can reduce the outside noise transmission into your home and save your sanity. 9) Increases security from all outside elements New windows help protect your home - and no, we’re not just rabble rousing. There are all kinds of outside stresses to keep out. Older windows can pose a security threat. Maybe the locks are failing or have stopped working altogether. And what about the outside weather elements? As sun streams in through an old window the light and UV rays fade furniture, clothing, artwork, carpeting, and decorative curtains. Many replacement windows feature insulating double-pane glass that can block up to 94% of the sun’s ultraviolet rays. Thinking it might be time for a window replacement? Get started on your project today by speaking to one of our experts at 978.697.4625 or visit Boston Renovation.com. All homeowners have to face the day when a window replacement becomes a necessity. Many choose to replace their windows for improved energy efficiency or to upgrade the look of their house. Whatever the reason, window replacement is an unknown territory to many and the biggest fear factor is often cost. However, there are actually plenty of ways to replace windows while on a budget. Cost to Replace Windows
The price of replacement windows varies greatly depending on a number of factors, such as material, style and customizations. This guide outlines all of the influential factors to give you a better understanding of the cost of your window replacement project. Window Style You can’t get very far in the window customization process if you haven’t settled on a window style. Trying to compare the costs and benefits of finish options on a casement and a double hung is like comparing apples to oranges. Deciding what style you want is key to determining which brand can best cater to your vision of the finished product. Double Hung: Double hung windows are the most popular and well-known window style, and are comprised of two operable sashes in a single frame. Double hung windows typically cost between $500 and $900, including installation. Single Hung: Single hung windows are similar to double hung, but only have one moveable sash. Due to the simpler operating system, they tend to be one of the cheaper window options. Single hung windows typically cost between $400 and $600, including installation. Casement: Casement windows are single sashed frames that are hinged at the side and open outward. They typically cost between $600 and $1,000, including installation. Slider: Slider windows are a great choice for hard to reach areas of the house. As the name indicates, this window style slides open, providing easy to access ventilation. Slider windows typically cost between $500 and $900, including installation. Bay: Bay windows have a large center window flanked by two smaller windows - usually double hung or casement window - at an angle. As they are composed of multiple windows, bay windows tend to be more expensive than other window styles. Bay windows typically cost between $4,500 and $6,000, including installation. Bow: Bow windows consist of four or five casement windows that work together to create a curved shape, that extends out from the house. Similarly to bay windows, bow windows tend to cost more due to the multiple windows that comprise them. Bow windows typically cost between $5,000 and $6,500, including installation. Picture: Picture windows are non-operational windows that are most often used as decoration, to let in additional light, and give the appearance of a more spacious room. Picture windows typically cost between $500 to $1,000, including installation. Awning: Awning windows are single sashed frames that are hinged at the top and open outward. These windows typically cost between $600 and $850, including installation. Basement Hopper: Hopper windows tilt down and can swing either into or out of the house. These windows typically cost around $500, including installation. Each of these styles of windows offers different benefits in function and design, and they will not directly compare in price on a size to size basis, but the more you explore what you want the more clear the frontrunners for your next window will become. Window Material There are a wide variety of window materials to choose from and they can vary significantly in price. To determine which material is right for your home, check out our Window Frame Guide. Vinyl: One of the most popular and affordable materials for a window replacement is vinyl. Vinyl double hung windows typically cost between $500 and $800, including installation. Composite: Composite windows are popular for their ability to imitate the appearance of wood, while remaining low maintenance. Composite double hung windows typically cost around $900, including installation. Wood: Wood is considered to be a premium material for window frames, due to its strong aesthetic appeal. Wood double hung windows typically cost between $800 to $1,500, including installation. Additional Costs When it comes to window installations, homeowners are offered a wide variety of customizations. These customizations include: Glass panes The most important aspect of windows is the glass used in them. Glass is the aspect of window shopping where price can increase quickly, but value can increase as well. Glass types that are more energy efficient have lower rates of heat transfer, reduced sound emission, and higher weather ratings, so they will tend to cost more. Over time though, energy efficient glass is a huge benefit to your energy bills. When comparing two windows, always compare their relative energy efficiencies. An expensive window that has lower energy efficiency than a less expensive window you are also considering probably won’t be the smartest long term investment in your home. Consider upgrading to triple pane windows which have a greater affect on energy bills. Grid patterns Grids are straightforward - more grids costs more money. You can get many different configurations depending on what window style you go with. When it comes to what type of grid you want, the decision becomes more based on preferences. The basic types are interior/exterior applied, grids between the glass (GBG), and simulated divided lite (SDL). Some windows can come in all types, some only in one. Interior or exterior applied grids are applied only to the outside of the glass. Applied grids are the least expensive because at close inspection of the glass you can see that there are no grids within the glass, so the illusion of individual panes separated by the grids is lost. GBGs are also generally inexpensive, but they lack the opposite component, which is the grids extending from the frame on the outside of the glass. SDLs are more expensive because they include grids applied to both the inside and outside of the glass, so they closely simulate the look of individual panes created by the grids. Some premium windows even come in authentic divided lite, which are authentically individual pieces of glass in each grid, and which are the historic style of building windows that SDLs seek to imitate. Authentic divided lite grids are by far the priciest option. Other features that influence cost include:
To stay within your project budget, it's important to keep all of these factors in mind. However, the wide variety of product styles and materials that are available mean that a window replacement can be possible with just about any budget. To learn more about your window options and associated costs, call us at 978.697.4625 or visit Boston Renovation.com. One of the first steps homeowners must take when starting a window installation is deciding on a window style. There are many window style options, and they all possess their own unique features. To help you understand your options, we’ve compiled 14 of the most common home window styles. You'll also find window prices and general costs included in this guide. Window Frame Designs Single Hung ($150 - $400) The single hung window style consists of a bottom sash that can be raised and lowered, and a stationary upper sash. This window type offers a similar appearance to double hung windows, but often at a lower cost, due to the more limited functionality. Single hung windows create a classic look in any home, and can often be installed with a variety of customizable grids. Double Hung ($300-$900) Double hung windows are the most popular and well-known window style, as they complement almost every style of home. Double hung windows are named based on their function. To open them, you simply slide a sash up and down. Each sash on the window operates independently, meaning the window can be opened both from the top and from the bottom. This factor is what distinguishes double hung windows from single hung windows, where only one of the two sashes is operable. When these windows are closed they can be securely locked with a variety of hardware locking mechanisms. Awning & Hoppers ($300 - $700) Awning windows have hinges at the top and open outward with a crank allowing them to catch breezes from any direction. Often times, homeowners will place an awning window above or below other windows to add architectural style, light, and ventilation to a room. Awning windows are also popular above or below windows that don’t open like a picture window. Hopper windows are the sibling of awning windows, as they function in a similar way. This window style is hinged at the bottom, and opens into the home with a crank mechanism. Hopper windows are commonly found in small spaces in need of ventilation, such as bathrooms or basements. These windows often have a wide opening, allowing plenty of fresh air into the room. Bay & Bow ($1,300 - $7,000) Bay windows have a large center window flanked by two smaller windows - usually double hung or casement window - at an angle. Bay windows are the centerpieces of many great rooms and views, and project out from the wall providing an opportunity for additional light and a more spacious feel. This window type is suitable for any style home, as bay windows add charm to a traditionally designed home or create stunning views and sight lines in a contemporary setting. Bow windows are elegant feats of architecture and design that extend out from the home and create expansive views. They consist of four or five windows that create the curved shape of the bow window. These windows are typically made up of a combination casement windows, which open outward. They differ from bay windows, which are typically composed of three windows and form a hexagonal angle rather than a curved shape. You’ll most often see bow windows in older homes, like a Victorian style home for example, but they really can be adapted for any room. Casement ($250 - $900) Casement windows have hinges on the side and open out to either side. They provide top-to-bottom ventilation in a similar way to an open door. Casement windows are typically taller than they are wide, in a similar fashion as double and single hung windows. This window type can installed individually, as part of a pair, or as a group of multiple windows. Casement windows are also commonly found above kitchen sinks. Egress ($1,500 - $5,000) Egress windows are a unique window type due to their very specific function. This window style is often required in finished basements and provides a route for entry and exit in case of an emergency. As these are often required by building codes, egress windows must meet specific criteria in terms of dimensions. While they are very functional windows, there are many elegant egress styles available for homeowners to choose from. Garden ($1,500 - $4,000) Garden windows, as the name suggests, provide a dedicated space for plants to flourish inside your house. This window style extends outward, creating a glass box that floods plants and rooms with natural light. Garden windows are often found above kitchen sinks, but they function as an eye-catching centerpiece in any room they are installed. Picture ($150 - $850) Picture windows are non-operational windows that are most often used as decoration, to let in additional light, and give the appearance of a more spacious room. They can be manufactured in almost any shape, and placed to enhance any view. Unlike other window designs, picture windows do not have a specific function makes them suited only for certain rooms in the house. They are an extremely versatile style that can be installed anywhere to increase access to natural light. Shaped ($500 - $5,000) As the name suggests, there are a variety of specialty window shapes and sizes available, and shaped windows can be manufactured in almost any design imaginable. The most popular styles of shaped windows include arched windows and round windows. Arched, or radius, windows are rectangular around the bottom and round, or arched, towards the top. Round windows are circular in shape, and can be created in a variety of custom sizes. Shaped windows often become the center of attention in any room they are installed, and some of the world’s most impressive architecture feature this type of window. This window style can be operable, with the ability to open and close, or completely stationary. Skylight ($900 - $2,500) Skylights are a gorgeous addition to any room, as they bring in incredible amounts of overhead natural light. This window style is installed on a roof, and its positioning means that it must be installed with careful consideration. Skylights can increase the temperature of a room, but this can be prevented with customizable tints, glazing and coatings. Additionally, skylights are offered in either stationary or operable styles, which open outward and release hot air accumulations near the ceiling. Sliding ($200 - $1,300) Sliding windows open horizontally and create a contemporary look in any room. These types of windows open with a sash sliding left to right, or vice versa. Many find this window style to be easier and more convenient to open than windows with vertically moving sashes. They are well suited for installation in modern style homes, but can function in virtually any home. Sliding windows are available in either single slider styles or double slider styles.
Storm ($350 - $800) Storm windows are a unique style, as they are installed on either the inside or outside of existing windows in a house. They can be used to decrease the draftiness in a house, by blocking the flow of air in older windows, and often increase energy efficiency. Storm windows are a cheaper alternative to a complete window replacement, with similar energy bill savings. Ready to start your project or need more information? Fill out your project details or call us at 978.697.4625 About Vinyl Siding Vinyl siding is known for its ability to imitate natural wood or shake without the heavy maintenance. This siding material comes in a variety of colors and styles to match any home's exterior and your budget. Vinyl is a popular siding material among homeowners seeking the value of premium siding, lots of variety, limited maintenance, and energy efficiency. In fact, over 30% of all exterior cladding on new and existing homes is vinyl. When shopping around you want to look for a quality product and an expert installer - our experts are here to help you with the process.
How much does vinyl siding cost? Average cost for vinyl siding is $650 per 100 square feet to $1,400 per 100 square feet, including installation. Price can be higher or lower based on brand, size of home, material class, and more factors. Reasons to Replace Your Siding You know it’s time to replace your siding. We’ve talked to thousands of customers and we want to share some of the most common reasons for a siding project. Do any of these sound like your home? Warped or Rotted Boards: Be your own detective. You may have noticed a softness or squishiness to your siding boards. That means they’re rotted and it’s time to replace them. If your current siding is vinyl, if you notice any warping or sagging (you can see this with a naked eye) you should be concerned. Frequent Painting: You shouldn’t need to be painting every 3 years. If your paint fades in less time, it means your materials are not up to snuff. You can detect this by looking for chipping, cracking, or peeling of paint. Heating and Cooling Costs: It’s important to take note of your heating and cooling costs each month. If your costs are abnormal, or rising compared to your neighbors, it may be because your siding products are not energy-efficient due to age or use. Loose Material: Storm damage can easily do damage to your siding. While one or two boards may not be a reason for panic, large areas that showcase loose or cracked materials are signs that your home is in desperate need of a professional. Mold, Mildew and Fungus: Mold, mildew and fungus can be a huge indicator that your house is experiencing some form of water seepage. You’ll need to fix that with new siding. Interior Issues: Loose wallpaper and peeling paint on your interior walls can be a sign that your exterior boards are allowing moisture to penetrate your house. Fading and Discoloration: Faded and discolored exterior boards may be a cause for concern. While the life expectancy for your home’s exterior should be long-lasting, it will still eventually run its course. Faded boards are an indicator that exterior waterproofing has reached its limits. Holes: Your two main siding enemies are weather and insects. From burrowing termites to Mother Nature’s punishment, keep an eye out for glaring holes in your siding. Get 3+ vinyl siding quotes Benefits It's affordable. The cost savings over wood siding, aluminum siding or any other material are high - in fact it’s almost half of what you’d pay for wood. It's extremely versatile and low-maintenance. One of the major benefits of vinyl is there’s no need to paint your home, ever again. It resists pesky pets and termites unlike wood siding. It will never rot. A quick wash once per year (to remove mildew and dirt) will keep the siding looking new for a long time. This saves from unexpected home costs and you’ll be getting your money’s worth. It's more durable than other options. Heavy wind, rain, hail, and extreme sun will not affect the look or integrity of your siding. In many cases, the warranty of this type of siding lasts upwards of 50 years to a lifetime. The chemistry of vinyl siding makes it much harder to ignite and easier to extinguish. Despite claims to the contrary, the smoke is not any more toxic than wood. This product cuts your heating and cooling bills. Insulated siding prevents heat loss between the studs in exterior walls and keeps your home at the temperature you prefer. As a bonus, installing insulated vinyl may make you eligible for certain tax credits. The innovative locking system many siding products use creates a weather barrier that stands up to even the harshest climates. Vinyl Siding Installation Installation is critical to your project, so it's important to trust a professional. Siding is most often installed over the wall sheathing after the old siding has been removed, from roof to foundation, and utilizing corner posts. Sometimes, it can be installed directly over the home’s current siding. Either way, the siding needs to be nailed into solid real wood for a strong base. When siding is removed during a project, it’s a great time to assess your insulation and weatherization needs. Insulation can be blown directly into the wall cavities or over the sheathing. The entire project takes about one to three weeks, depending on the size of your home. You can choose between vertical and horizontal siding, depending on your home's construction and your personal preferences. What are the best vinyl siding brands? CertainTeed MainStreet: CertainTeed’s MainStreet siding is the ideal choice for homeowners looking for value with the benefits of premium vinyl siding. If you’re looking for a virtually maintenance-free exterior with consistent quality and a variety of options to fit any budget, look no further than MainStreet. MainStreet features a thickness of 0.042", a selection of 24 colors including six deluxe colors, and a lifetime limited warranty with PermaColor lifetime fade protection. You'll be impressed with the CertainTeed siding colors, especially the unique colors that you can't find with just any brand. MainStreet is available in a clapboard style, which is the most traditional and found in all parts of the United States, and a dutchlap style, which offers strong shadow lines and is highly popular in the Mid-Atlantic region. These are some of the most popular siding styles in the country and consistently ranked as one of the best vinyl siding brands in the country. Crane: Crane is a vinyl siding manufacturer that is dedicated towards providing customers with siding products that not only benefit the general look of the house, but can also save the customer money. Their vinyl siding is of a premium grade that can be found in a large variety of styles and colors. The assorted styles that customers can choose from include that of Crane Market Square, Crane Carolina Sands and Crane Dreams, among others. Alside: Alside is one of the largest manufacturers of vinyl siding in the world, as well as one of the best. While they produce a wide range of different types of products, they specialize in vinyl siding. No matter what type of vinyl siding you're looking for, Alside has it all, as they offer customers the ability to choose from 14 types of vinyl siding, all with different sets of features. Speak to an expert about your siding project at 978.697.4625 or visit Boston Renovation.com. Our experts are ready to help you with your project and answer any questions you may have. How Boston Renovation's Siding Replacement Process Works 1: We visit your home. After answering a few questions online, our licensed expert will complete a detailed project report in-person. 2: We get you 3 bids in 3 days. Vetted local siding contractors submit bids based on your report. Our expert helps you compare them. 3: Meet your top contractor. Choose the best contractor and meet before committing. We stay in touch to ensure the project goes smoothly. The number of siding materials available provides homeowners with the ability to find the product that perfectly matches their preferences in terms of style, maintenance and cost. To help you get a better understanding of your options, we explore the eight most popular siding products on the market. The average costs highlighted below include installation and are listed as the price per square foot. Exterior Siding Materials Vinyl ($5 - $14) Vinyl siding has become the most popular option for homeowners in the US for a variety of reasons. It is quite durable, with the ability to resist damage from weather, insects, color fading, and more. Due to its durability, vinyl siding requires little maintenance. On top of this, vinyl is praised for its affordability and is one of the best value siding options available. This siding material is available in a wide variety of colors, textures, and styles, and often can impressively imitate the appearance of wood siding. Vinyl siding typically lasts between 20 and 30 years. Fiber Cement ($5 - $15) Fiber cement is the product of years of innovation in the siding industry, and has skyrocketed in popularity over the last couple of decades. It shares many of the same qualities as vinyl, but with an improved lifespan and durability. It is completely resistant to insects, rotting, mold and fire, and requires little to no maintenance. Fiber cement shingles are thicker than those made of vinyl, allowing for a more accurate imitation of wood shingles. However, these added benefits do come at a cost, as fiber cement is a more expensive option than vinyl. Fiber cement siding typically lasts 50 years. Wood ($6 - $11) Wood siding is a popular choice for homeowners looking for a visually appealing siding, and who are willing to commit time to the necessary maintenance. While many synthetic siding materials are able to imitate the appearance of wood, there’s nothing like the real thing. Wood siding can be installed as clapboards, shingles or vertical boards. This siding material is susceptible to damage from insects, weather and fire, so requires consistent maintenance. If taken care of, wood siding can last up to 30 years.
Aluminum ($4 - $6) Aluminum is one of the best value siding materials available and it gives any home a unique, contemporary appearance. It is fairly durable, with strong resistance to weather and insects, but can be dented and scratched with ease. However, overall it is easier to maintain than wood and often more durable than vinyl. Aluminum siding typically lasts up to 40 years. Stone ($15 - $30) Stone is an eye-catching siding choice that is durable and long-lasting. Stone siding is resistant to various forms of damage, such as weather, insects, fire and rotting. Due to this, stone siding requires very little maintenance. This type of siding, however, is very heavy and homes must meet certain structural standards to be able to support stone. The weight also causes installation to be more expensive as compared to other siding materials, but is worth it to many homeowners due to the material’s longevity. Stone siding typically lasts over 100 years. Brick ($8 - $20) Brick is a traditional siding choice that has been popular among homeowners for centuries due to its extreme durability. Brick is extremely fire resistant, resistant to damage, and doesn’t fade. In addition, this type of siding typically requires no maintenance for the first couple of decades. Like other heavy siding materials, installation is expensive and repairs can be quite costly. Brick siding can last over 100 years. Faux Stone ($5 - $11) Innovations in the siding industry have resulted in a synthetic siding that could easily be mistaken for real stone. Faux stone is made of a cement blend, which is light and easy to install. However, this product lacks the durability of real stone, and while it is resistant to weather, insects and fire, it can scratch and crack easily. Faux stone typically lasts up to 25 years. Engineered Wood ($3 - $8) Engineered wood is manufactured by combining various types of wood into composite sheets or panels. This material provides homeowners with the elegant appearance of real wood, with improved durability and value. Engineered wood siding is more resistant to damage from weather, insects and rotting, and requires little maintenance. It is also easier and more affordable to install than real wood. Engineered wood has a typical lifespan of 20 to 30 years. Ready to find the perfect siding contractor? Our licensed experts are ready to help - call us at 978.697.4625 or visit Boston Renovation.com. Engineered Wood Benefits
Talking with homeowners is one of the most rewarding parts of my week and I know our customers appreciate our honest help and advice. There is really only one topic where it seems our advice is not only at times disputed but, seemingly, unwelcome: engineered hardwood flooring. I’ve had more than one homeowner get audibly frustrated with me at my insistence that engineered hardwood flooring might be the most appropriate solution for their specific project. Why is this? What misconceptions do these homeowners have that prevents them from taking my advice? Why do they insist that they want the “real stuff?” Let’s take a step back and understand what engineered flooring is and what it is not. Engineered hardwood flooring is 100% wood. It is not laminate flooring and it is not “cheap.” The surface layer is the exact same material that a solid floor is made of. In fact, many manufacturers make the same style of floor in both solid and engineered versions and it is 100% impossible to tell them apart. Engineered hardwood can be used in more environments. Under the surface layer of solid wood, there are multiple levels of manufactured wood product (think plywood). These layers are assembled in a crossing pattern meaning that they expand and contract in 90 degree angles. As a result of this process, engineered floors are impacted much less by changes in humidity and temperature and, therefore, can be used in environments where solid hardwood would be prone to warping or damage. Engineered flooring can be installed over any surface. While solid hardwood can only be installed by nailing it down to wood subfloor, engineered hardwood isn’t subject to any such restrictions. If your home or condo has cement floors (basements) there is simply no way to use solid flooring. Engineered flooring can be less expensive and more environmentally friendly. Engineered hardwood uses much less of the solid wood species from which it is made. Therefore, for more expensive and rarer wood species like walnut and tigerwood, engineered flooring can both be less expensive and more environmentally friendly. It can also be manufactured in much wider board widths. So where do all the passionate feelings that engineered hardwood is an inferior product come from? Honestly, I don’t know. I think people confuse it with laminated hardwood which, rather than using the solid wood top layer as engineered hardwood does, uses a printed image made to look like wood. That stuff is an inferior product and does not look the same as solid hardwood. Maybe it’s the name? It is plausible that when people hear “engineered” then they incorrectly think it’s not real wood. Engineered vs. Solid Wood But, c’mon, there must be something about engineered flooring that is not as good as solid. Right? Well, here is what I can come up with: Solid hardwood can be sanded and refinished multiple times. Engineered can certainly be refinished but perhaps only 2 to 4 times depending on the thickness of the wear layer. Considering a floor only needs to be refinished when it is worn or damaged (may be every 15 or 20 years), I’m not sure how much to hold that against engineered flooring. Plus, most engineered flooring comes prefinished and, usually, with a 30+ year wear guarantee. “Swirly” grain pattern when the top layer is shaved, not sawn. On some lower-end engineered hardwood flooring products, the top wear layer of wood is not cut from the tree in the same way as solid hardwood. It is “shaved” rather than “sawn” resulting in grain patterns that can be a little “swirly” compared to the traditional look. It isn’t that the product itself is inferior, it just has a look people sometimes don’t like. Again, this is typically on the lower-end, less expensive options. This post may not change everyone's mind but if it reaches just one person and helps make our conversation with them more productive and helpful then it was definitely worth it! :) Some homeowners are surprised to see window condensation on their newly installed windows. Condensation on the room-side surface of a window can be misinterpreted as an installation or product defect. This is particularly common in the winter months as temperatures drop and heat dials go up.
We have good news: condensation on the room-side pane of glass (ie, inside the innermost pane) is actually a sign the windows are working and may have solved a problem that you didn’t know existed! Condensation on windows... a good thing? If a window has been installed properly, it will not allow humidity, or heat for that matter, to escape your home. It’s likely condensation did not form on your old, drafty windows because the air in your home flowed right out of them... and with it the precious heat or cool air that you pay for every month! With properly sealed windows, humid air comes in contact with a cold surface - in this case the glass in your windows - and forms condensation. Luckily, room-side window condensation is nothing to worry about on new windows! But, if you have old windows and need advice, call us at 888-392-4236 or start a project directly on our replacement windows page. Assuming you have recently installed windows, if the moisture is significant and you find yourself having to wipe down the sills, that’s an indication that the humidity levels in your home are likely too high. Here are a few things that can help: Keep ventilation fans on. Bathrooms and kitchens are both big culprits for producing moisture in your home. Make sure to keep ventilation fans running while cooking or showering, and even leave them on after you're finished for a few minutes. Lower your thermostat. Consider aiming for around 66°- 68°F when no one's home or overnight. Use a dehumidifier. Dehumidifiers are most often used in basements but can also help quite a bit in other rooms in the home prone to higher humidity levels, like bathrooms. Store firewood outside. Freshly cut firewood contains a large volume of water that evaporates into your home when stored indoors. Consolidate house plants into fewer rooms. Plants release moisture into the air and can dramatically impact the humidity levels in your home. Try not to over-water plants as well. If you have new windows - use them! You can simply crack open a window for a few minutes to let some dry air in and balance out humidity levels. Still need help? Call us today at 888-392-4236 to speak with our licensed renovation experts and get your project started. You can also start exploring window project options on our replacement windows page. Homeowners love the Andersen 400 Series Frenchwood Sliding Patio Door. The elegant finishes add class to any living room or kitchen. Andersen 400 series patio doors are well-constructed units and the top of the sliding patio doors market.
The Andersen 400 series Frenchwood sliding patio door is the best selling sliding patio door from the largest manufacturer in the USA. The Frenchwood sliding patio door is durable, Energy Star Compliant and offers a wide range of features. If you are looking for a classic style wood patio door, the 400 Series is a great choice. The items we'll cover in this review are:
About Andersen Doors For more than a century, Andersen has been the most trusted brand for windows and doors. They offer an extensive collection of high-quality products. Andersen is committed to integrity, excellence, and innovation. Whatever project you are working on, Andersen will have the products you need in a variety of sizes, wood options, colors, and accessories. Warranty Info Andersen offers an impressive warranty - the glass is protected for 20 years, and parts are protected for 10 years. Pros and Cons Pros
Tech Specs
Summary Andersen sliding doors offer durability, longevity, and quality craftsmanship. With an emphasis on excellence, these doors are a no-brainer to add value to your home. Basement egress or "hopper" windows are almost always used in basements and open inwards from the top. They work this way to avoid accidental damage from the outside and to keep water out. The Harvey Classic vinyl hopper window is custom made, delivers excellent performance and offers a variety of styles, colors and options to meet the needs of your replacement window project. Pros and Cons
Pros:
Features The Harvey Classic vinyl hopper window's sleek fully welded sash and frame design provides an air-tight seal keeping water and wind outside. We automatically include the ENERGY STAR® qualified glazing upgrade with Low-E coating and Argon gas. Other features include:
About Harvey Building Products All Harvey Building Products (based in Waltham, Massachusetts) are custom made in the US and are available in a variety of colors and options. They come with industry-leading warranties and thermal performance, and are a popular choice for homeowners seeking a well-constructed windows and patio doors custom made for their home. Harvey Classic Vinyl Hopper Cost The Harvey Basement Hopper Window is typically installed for around $475. The total price may increase or decrease based on selected attributes during the planning process. HardiePlank® lap siding is the best-selling product from the leader in fiber cement siding, combining high performance with beautiful, classic design. Installed on more than 5.5 million homes from coast to coast, all styles are specially engineered for their climate zone and can come either primed or with baked-on ColorPlus® technology. About HardiePlank Fiber Cement Siding
If you’re looking for superior durability and the timeless look of woodgrain without the maintenance, James Hardie is the perfect siding choice. Compared to other siding materials, fiber cement products stand up to weather, moisture, heat and insects like no other siding can. With Hardie’s exclusive ColorPlus® Technology, multiple coats of color are baked onto the board in a controlled factory environment and a proprietary finish is applied, designed to resist UV rays so that your color will stay vibrant for longer. You can choose from a curated selection of stunning exterior colors, or you can have your siding primed to be painted later. HardiePlank® comes in multiple width options and is available in both Smooth and Select Cedarmill finishes. Why choose Hardieplank fiber cement siding? Long life span. An industry leader in longevity, fiber cement siding lasts over 50 years. The combination of cost, durability, and environmental impact makes this material more popular with homeowners. The look of real wood. Wood can rot. Wood can be eaten by bugs. Wood can warp. Wood needs expensive paint jobs every few years. Fiber cement gives you all the aesthetic benefits of wood, with none of the headaches. Versatility. James Hardie offers dozens of different colors and styles for their Hardieplank line. Mix and match the options on Boston Renovation.com to create your dream siding project. Straight installation. Installing fiber cement takes a bit longer than vinyl alternatives because you need to measure each placement, but it also ensures the rows are being put on straight. Pros and Cons: Pros:
Colors, Finishes and Options
About James Hardie Siding HardiePlank lap siding is a sleek and elegant siding choice that imitates cedar planks and possesses numerous features that add value to your renovation. James Hardie is an industry leader with 50+ years of longevity in siding products, and the combination of cost, durability, and environmental impact makes fiber cement popular with homeowners. James Hardie fiber cement planks are five times thicker than traditional vinyl siding, improving insulation and creating a more realistic woodgrain effect. In the case of a fire, noncombustible James Hardie products are recognized as some of the safest options by fire departments nationwide. HardiePlank Pricing Hardieplank siding with installation costs ~$1,500 per 100 square feet. CertainTeed, a leading name in vinyl siding, has helped shape the building products industry for over 110 years. Founded in 1904 as General Roofing Manufacturing Company, today, CertainTeed is North America’s leading brand of exterior and interior building products. CertainTeed is a subsidiary of Saint-Gobain (one of the world's oldest and largest building product companies) and employs 5700 in more than 60 US manufacturing facilities. CertainTeed, a leading name in vinyl siding, has helped shape the building products industry for over 110 years. Founded in 1904 as General Roofing Manufacturing Company, today, CertainTeed is North America’s leading brand of exterior and interior building products. CertainTeed is a subsidiary of Saint-Gobain (one of the world's oldest and largest building product companies) and employs 5700 in more than 60 US manufacturing facilities.
CertainTeed Vinyl Siding - Brand History From its early beginnings, the company was renamed “CertainTeed” in 1917, inspired by their slogan “Quality made certain. Satisfaction guaranteed.” Starting with asphalt shingles, the product line expanded in the 1960s when the firm acquired a fiberglass insulation business and PVC pipe business. In October 2015, CertainTeed moved into a new state-of-the-art open floor plan headquarters. This ‘living laboratory’ enables their research team to measure the impact their products and innovations have in a real environment. CertainTeed Vinyl Siding - Philosophy Being green is one of their top priorities. CertainTeed leads the industry in sustainable business practices while improving product performance and style. And their vinyl siding is no exception. By streamlining operations to reduce carbon emissions, and by reprocessing all vinyl scrap, the manufacturing process has near-zero waste. The company feels that ‘we do well by doing good’. Both management and employees give back often, partnering with charities like Homes for Our Troops and YouthBuildUSA. CertainTeed Vinyl Siding - Products CertainTeed has a suite of products for residential homeowners making exterior improvements. Here’s a bit about their product lines:
Shopping for products If you’re looking for inspiration, the CertainTeed site has a number of features to help envision what your home could look like after a remodeling project.
Taking on a siding replacement is daunting, with many options, brands and materials to be considered. However, the most important factor for many is that of cost. Getting a siding quote is usually a tiring process involving numerous consultations with contractors and hours of time. While there are many siding calculators available online, they are only able to give rough estimates that are not based on specific products or installation fees. However, with Boston Renovation, your installation expert will scope out your project with one in-home meeting after which they’ll gather multiple quotes from vetted local contractors. All for free. Cost of Siding a House
So, how much does siding costs? There are a number of factors that affect the cost of a siding installation. These include the siding material, the size and surface layout of the house, the installation of additional materials such as fascia or trim, labor and location. We’ll walk through many of these factors to give you a better sense of how they impact the cost of your project. Get 3+ siding quotes today Siding Material There are a wide variety of siding materials to choose from and they can vary significantly in price. How much does vinyl siding cost? One of the most popular and affordable materials is vinyl siding, which can vary in price from about $650 per 100 square feet to $1,400 per 100 square feet, including installation. How much does fiber cement siding cost? Fiber cement siding, which is typically more expensive than vinyl, can cost anywhere from $1,400 per square feet to $1,800 per 100 square feet, including installation. How much does wood cedar siding cost? Wood siding is a classic choice and typically costs around $700 per 100 square feet, however it requires rigorous maintenance, which can greatly add to the cost over time. How much does aluminum siding cost? Aluminum siding is one of the most affordable siding options available. It is typically installed for around $500 per 100 square feet. Siding Styles Many synthetic siding products allow you to customize texture, edge style and color. However, some of these customizations can increase the price of the product. The cheapest style is always a smooth and simple one, with those that imitate materials such as wood or stone typically costing more. Some siding color options are also more expensive. It is important to keep your style choices in mind when calculating the cost of your project. Size and Layout of House Once you’ve narrowed down the siding material you are interested in, it’s important to determine how much will be needed. This involves determining the square footage of the exterior of your house, or section of your house if you are not doing a complete residing. You can calculate this number by multiplying wall lengths by the height of your house and adding them together. As siding is charged per square foot of product and labor, the square footage of your house will have a big impact on the overall cost. Additional Costs There are a number of additional and optional costs that can impact the overall cost of your siding project. The cost of having trim installed with your siding project can vary greatly, but can increase the cost by hundreds to a few thousand dollars. Additionally, if you need your existing siding stripped before the replacement, that can cost an extra $5 to $10 per 100 square feet to remove. You can also choose to have your gutters replaced and have new shutters installed with your siding project, both of which will add to the overall cost. Location The location of your house can change the overall cost of your siding project. This is due to factors such as demand for contractors, cost of living and the state of the housing market. For example, the average price for a siding installation in Boston is $14,500, the average cost in New York is $12,500, and in Cleveland the average cost is $7,900. It is important to keep this influential factor in mind, especially if you live somewhere where it could increase the project cost. So what's the average cost of siding? The average homeowner pays between $5,000 and $14,050 for siding to be installed on their home exterior. Vinyl siding costs about $0.90 to $2.50 per square foot compared to fiber cement at $0.70 to $5.25 and brick at about $3.50 per square foot. Determining the potential cost of a siding project is a step that should be taken early on in the process. It is important to understand the many factors that influence the total cost, and how to adjust them to fit your budget. While all of these factors can get confusing and difficult to track, your Boston Renovation expert can help you understand them all. How Boston Renovation's Siding Replacement Process Works 1: We visit your home. After answering a few questions online, our licensed expert will complete a detailed project report in-person. 2: We get you 3 bids in 3 days. Vetted local siding contractors submit bids based on your report. Our expert helps you compare them. 3: Meet your top contractor. Choose the best contractor and meet before committing. We stay in touch to ensure the project goes smoothly. Speak to an expert about your project at 978.697.4625. Our experts are ready to help you with your project and answer any questions you may have. Sliding doors are often the largest window in the house, and the last to be replaced. The Harvey Classic vinyl patio door can be ordered with different configurations and with either two, three, or four panels. It has many standard sizes (see below) and custom sizes to fit virtually any opening. Every Harvey vinyl patio door is custom made, delivers excellent performance and offers a variety of styles, colors, and options to meet your needs.  About Harvey
Harvey Building Products - based in Waltham, MA - has been manufacturing high-quality wood and vinyl windows, doors, and porches. Harvey has been manufacturing doors and windows since 1961, and their impeccable craftsmanship has only improved since. Best known for their vinyl doors and windows, Harvey offers an extremely competitive price in the market. If you are in the market for new patio doors, check out our review of their most popular sliding patio door: the Classic vinyl. Pros & Cons Pros
Cons
Tech Specs
Warranty Info Harvey offers an impressive warranty - 20 years on the glass, and 10 years for parts. Summary If you are looking for a durable, classic sliding door, the Harvey Classic Vinyl is perfect. It’s a great value and will add a lot of character to your home - without a hefty price tag! Designing your countertops is one of the most important steps of your kitchen remodel project. Your countertops serve an important functional purpose in your kitchen, but they're also one of the most noticeable features. Take the time to select a material that suits your personal style and is also durable enough to last for decades. There are many different countertop materials to choose from, so in this guide we'll explore your many options. Kitchen Countertop Considerations
Before designing your countertops, there are a few important questions you must ask yourself: What kind of use do your countertops get? How you will be using your countertops will heavily determine which material is best for your project. Whether you're a chef who cooks every night of the week, or have children that could potentially spill on and scratch the surfaces, it's important to find a material that matches your needs. Consider factors such as ease of maintenance, durability, damage and stain resistance, and more. What is your personal style? Besides the pure functionality of countertops, they also contribute greatly to the overall look of your kitchen. Select a material that matches your desired style. For example, if you want to create a farmhouse style kitchen, including a wood butcher block can help enhance the look. If minimalist and modern is more your style, unique materials such as concrete and stainless steel might work best. You also need to consider how your countertops will work with your backsplash. What is your budget? Unfortunately, this might be the most influential factor in your decision making process. Countertop materials can vary greatly in price, and it's important to consider not only material costs, but also installation and delivery fees. Take this into account when designing your kitchen remodel budget. Kitchen Countertop Materials Granite Granite is one of the most popular countertop materials, due to it's elegant appearance and durable performance. It's available in many different colors, meaning it can fit in to any kitchen style and color scheme. Each slab of granite is completely unique. Granite countertops are typically installed for $80 to $200 per square foot. Marble Marble countertops are a luxurious option that create a sophisticated atmosphere in any kitchen. However, these are not a great choice if your countertops are at risk of being scratched, as marble is a very soft material. However, many choose to install marble countertops in low-traffic areas of the kitchen to benefit from their appearance without the risk of damage. Marble countertops are typically installed for $80 to $170 per square foot. Laminate Laminate countertops are cost-effective and can imitate the appearance of more expensive materials. Laminate can be ordered in patterns such as marble, granite, stone and more. It is an extremely damage-resistant material, but is heat sensitive. Marble countertops are typically installed for $40 to $90 per square foot. Concrete Concrete has grown in popularity in recent years, due to its frequent incorporation in modern style home design. Concrete countertops can be extremely customized, from thickness to color to texture. It can be cast in a variety of shapes to create unique looks in any kitchen. It's also a very strong and durable materials. Concrete countertops are typically installed for $100 to $200 per square foot. This is only a selection of the countertop materials available. To learn more about your options, speak to one of our licensed experts. Give us a call at 978.697.4625 or start designing your project here. |

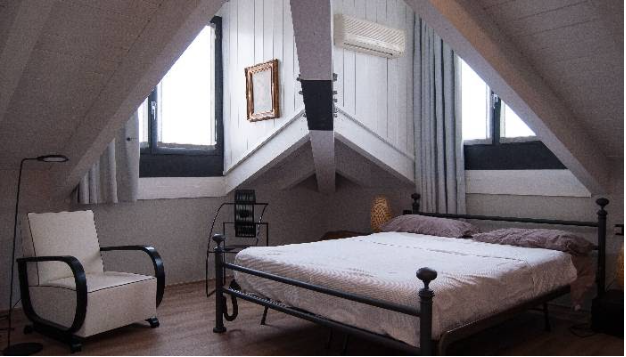
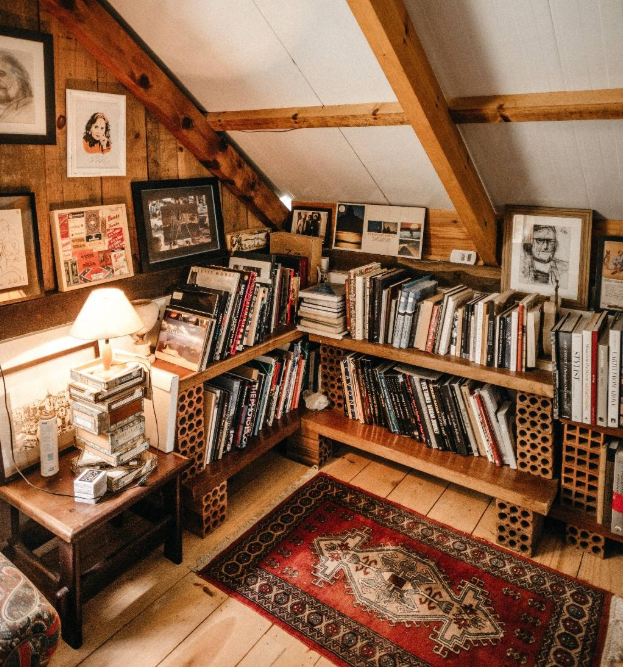
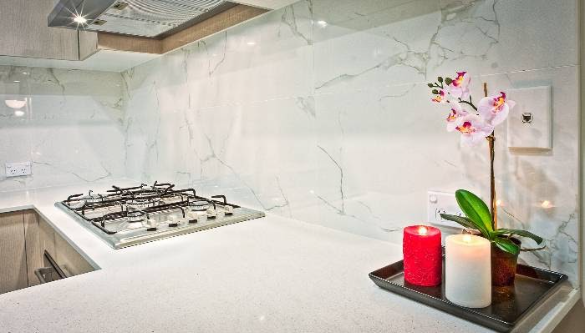
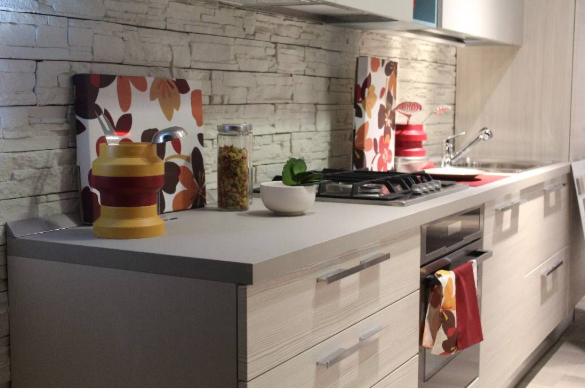
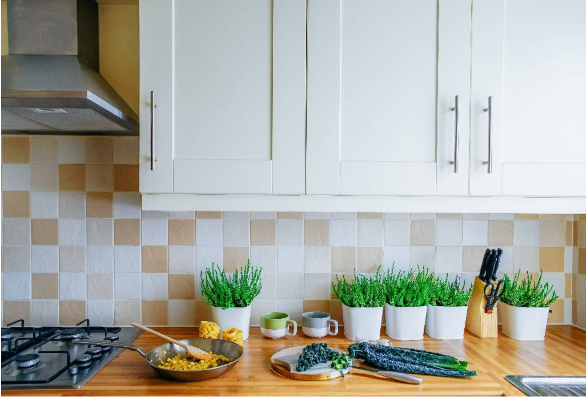
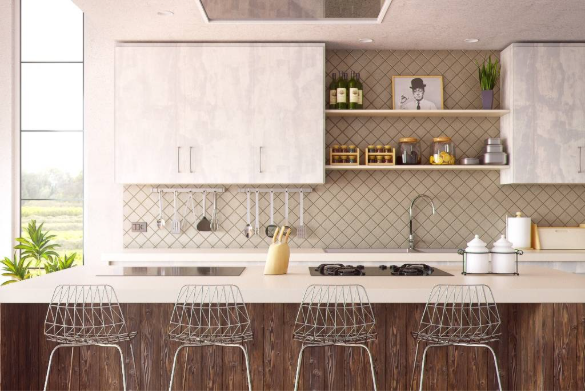
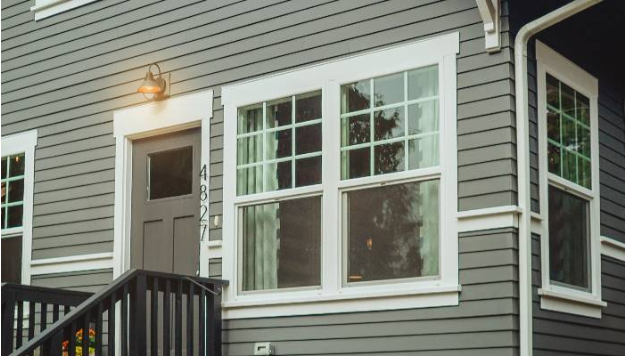
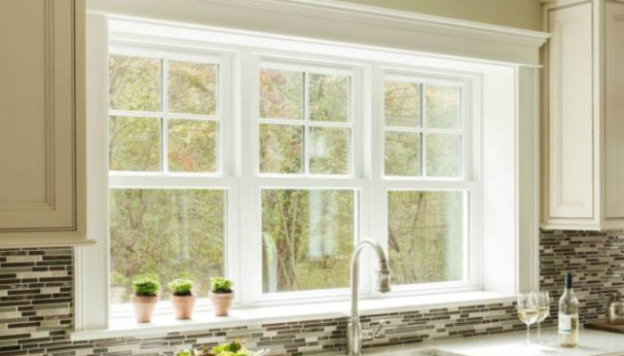
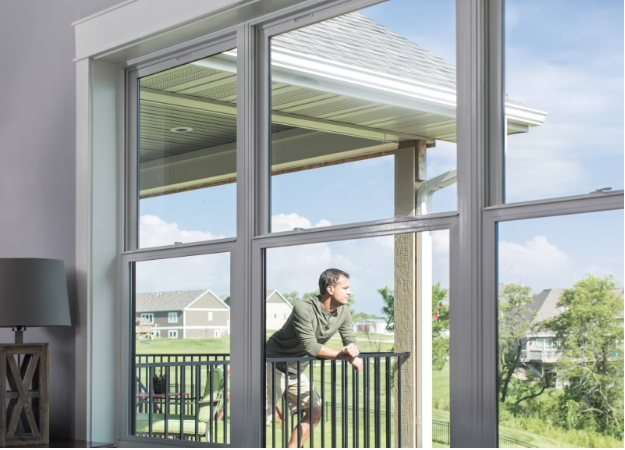
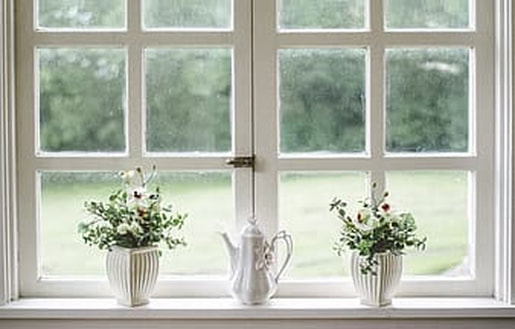
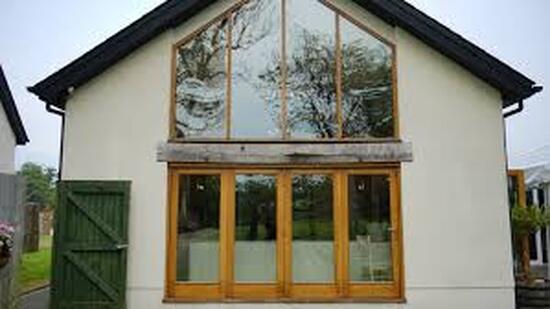
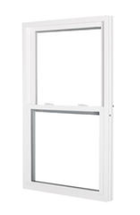
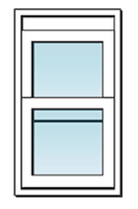
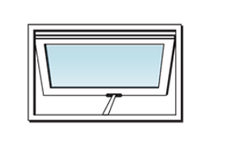
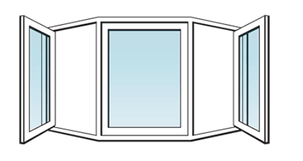
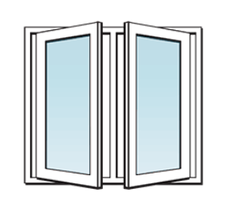
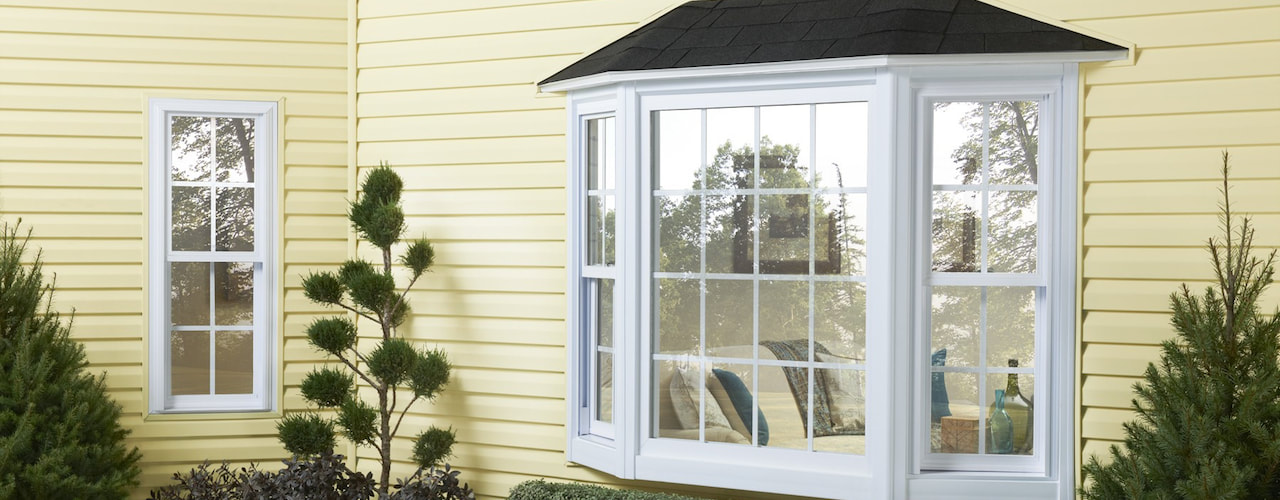

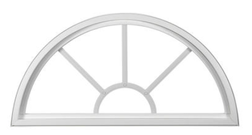
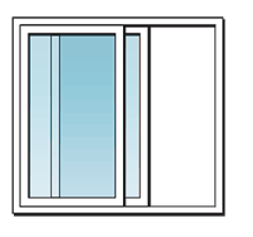
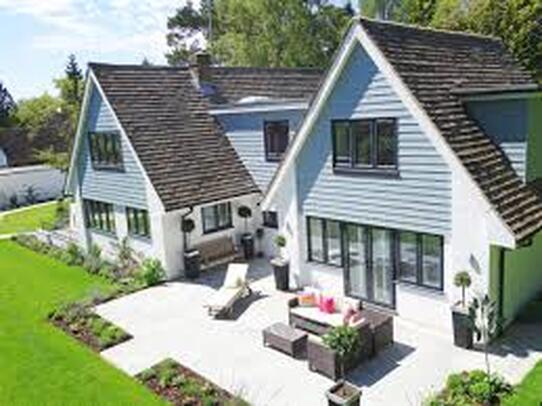
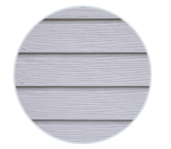
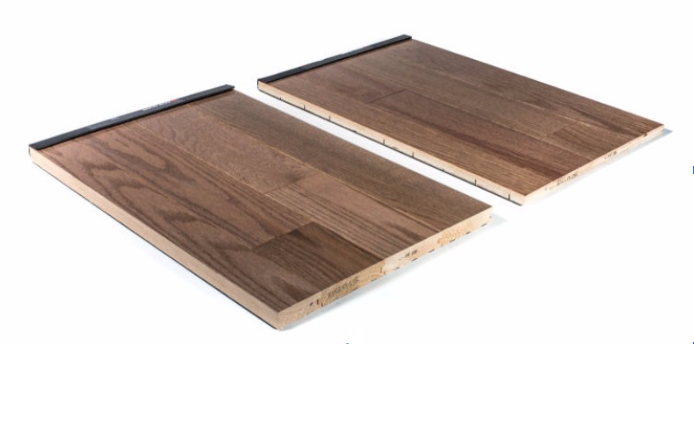

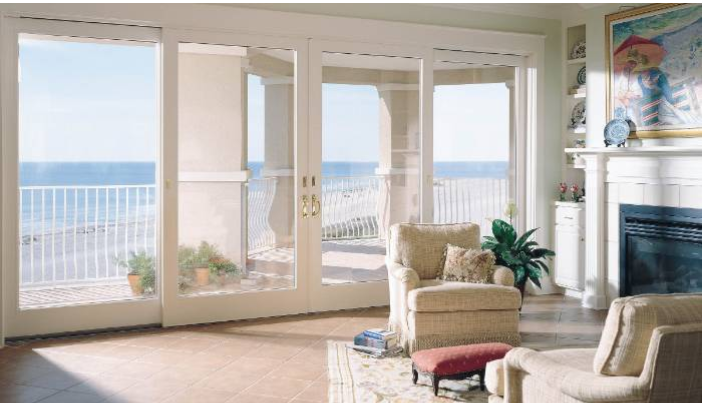
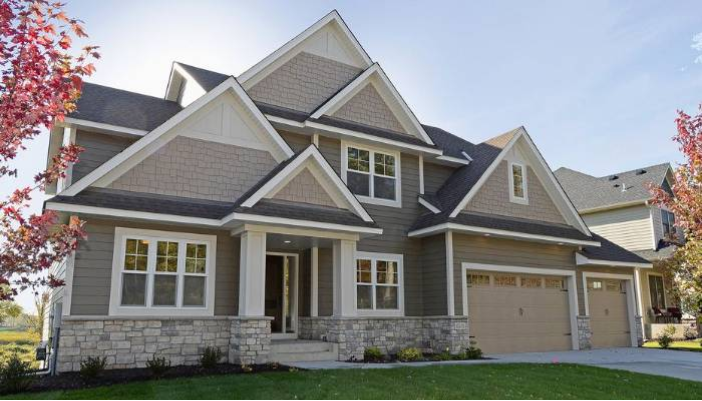
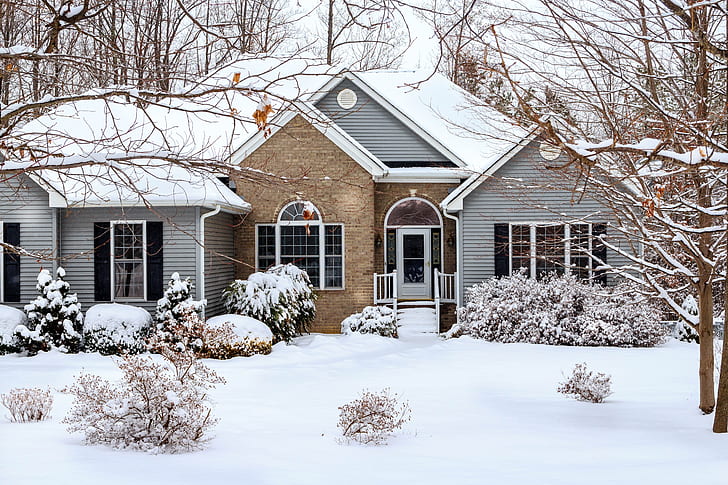
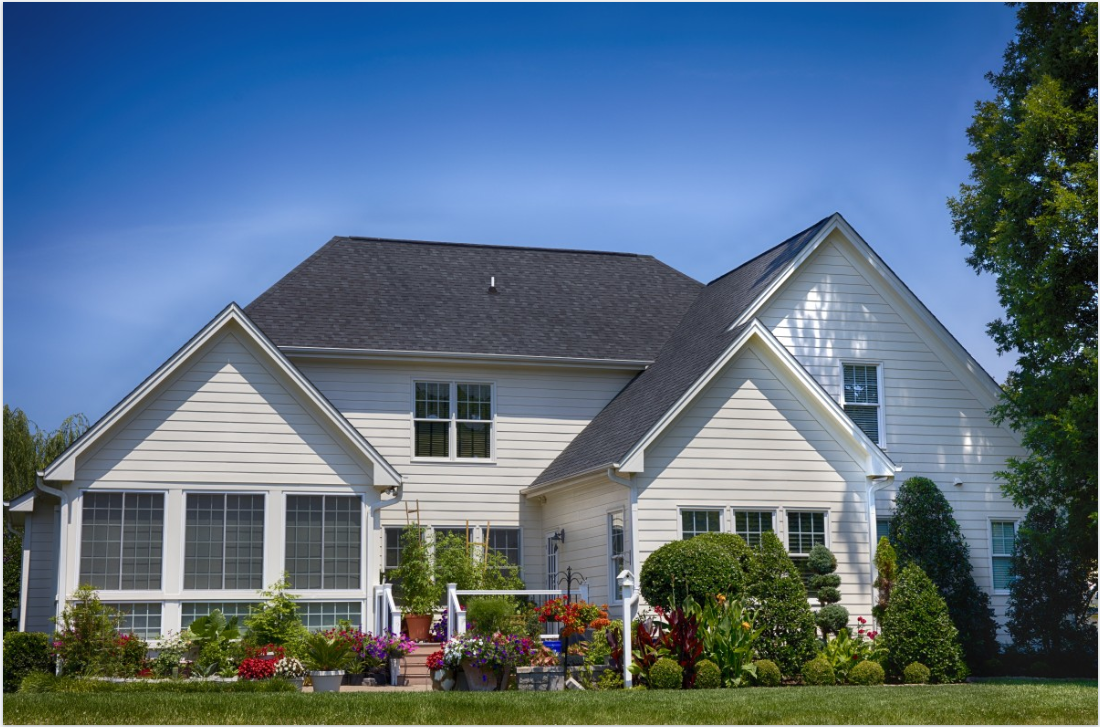
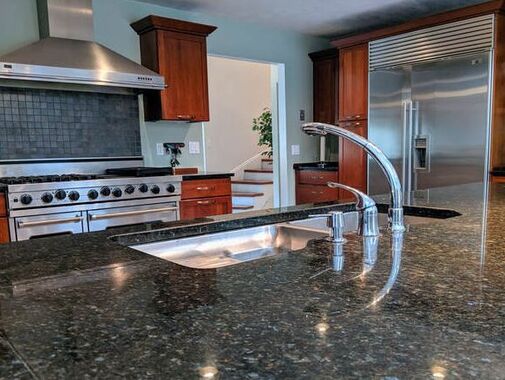
 RSS Feed